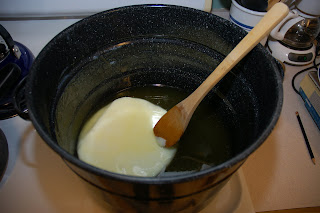
I chose to make castile soap. It called for 32 oz of water, 11 oz lye, 60 oz tallow, and 26 oz of olive oil. The ounces are measured using a scale NOT fluid ounces. This is very important!!!
First I measured out the lye and water into a glass bowl that I had placed in the sink. Lye mixed with water gets very hot, very quickly so I didn't want to have to move the container after mixing it! It was also important to stir the mixture with a wooden spoon to make sure it got mixed well. Next I combined the tallow and olive oil by heating it in a large pot.
It is also very important what types of containers and spoons you use, because the lye mixture can "melt" aluminum pans due to its caustic nature. I chose to use an enamel pot (although I think you can also use stainless steel), a glass bowl (due to the intense heat), and a wooden spoon. Once the lye mixture and the oil mixture were both between 95 and 98 degrees, I combined them by slowly pouring the lye mixture into the oil mixture while stirring constantly. I stirred the mixture until it traced (meaning you could draw pictures with the droplets falling off the spoon), which took about an hour.
 To protect my counter tops, I put down a towel covered with wax paper. It really wasn't that messy. Next time I might just lay down a towel.
The next day I uncovered them and found this beautiful soap!! It needs to cure for at least 2-4 weeks before it will be ready to use. Currently it is laying out uncovered on top of my kitchen cabinets with a light towel over them to keep out dirt. In about a month, I will take the soap out of the molds. There may be a light, white dust covering the soap. This is called washing soda, basically a more intense form of baking soda. I can either use it as is or try to dust some of it off to use in the laundry. I personally wouldn't use it for cooking. I suppose there isn't anything wrong with it, but I am just not comfortable with it!
And there you have it! My first attempt at making soap! It was much easier than I had anticipated! It was also fun, educational, AND economical! What more can you ask for?!?!?! I already had pretty much all of the supplies in my kitchen, and the ingredients cost me very little in comparison to purchasing soap! The expense of making soap really comes down to how much you are willing to spend. The next recipe I would like to try would only cost me the price of the lye, unless I choose to make my own lye. Hmmmm.....now there's a thought! Oh and if you were wondering what my husband's reaction was to all of this, he said, "Wow, it actually feels like soap!"


No comments:
Post a Comment