Showing posts with label Home Furnishings. Show all posts

Wednesday, May 26, 2010

Susie Home Maker: Floors Part 2

I just saw this on Design Mom and totally love it!! (yeah...no one is more surprised than me that I enjoy the blog of a designer...)


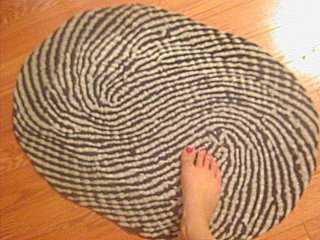
It's a potholder rug! I had to add it to our Susie Home Maker: Floors Edition! Maybe some day when I have more time...

Saturday, May 15, 2010

Susie Home Maker: Floors

"Now take your hands, the tools you work with, you'll be thrilled when you build something nice." from the 1951 movie, Here Comes the Groom

Well, I was going to do the next post in our Susie Home Maker series (inspired by my cousin Susie who is moving into her first apartment this year!!!) about bathrooms, since they can be rather challenging to decorate in an apartment. However, I realized that I had neglected a few other essentials...one of which is floors! The floors of most apartments are not that great. They typically have stains, holes and frayed edges in the carpet, chips in linoleum (or tile if you are lucky enough to have it), etc. I have no earthly idea when the floors in our apartment had last been redone but they were pretty gross!! The best thing you can do to hide these eye sores outside of being careful how you place the furniture is to use lots of rugs! You may be able to find some cute rugs for a good deal that match the other things you already have, but in the event that you don't, here are a few different ideas I have seen for making some really cute rugs!! (I have been really wanting to try some of these! I just have not had the time! Maybe when I start working on our bedroom...)

When I think about homemade rugs, one of the first types that comes to mind is a country braided rug! My parents used to have some of these in their home, and I have seen them in several relatives home. You can make them in almost any shape or size! To make them you just braid long strips of fabric (usually from a durable fabric like old jeans) and then stitch them together into the shape you want.


However, if minimal handstitching sends you into panic attacks, I have also found a pattern that has absolutely no sewing involved!!!


Along that same vein, if you are looking for something that involves fairly minimal sewing/needlework skills, you might also find these ideas pretty neat!


This is a pom-pom rug. You make lots and lots of pom-poms (very easy), and then you sew them (or potentially knot them) onto a rug canvas (or you could use some type of durable fabric like denim or burlap). I personally really like this rug because you could use yarn scraps instead of buying specific types of yarn!


This is a hook and latch rug. While it is another no-sew option, I do NOT recommend it! I have had one of these since I was in elementary school and I still have only completed a couple inches of it! It just takes a really long time to knot each little piece of yarn onto the rug canvas!


While this rug will involve a minimal amount of crocheting, it would make up much quicker than a hook and latch rug!


This rug would require a minimal amount of knitting, but once again would make up much quicker than a hook and latch rug!

Another option that would require minimal sewing would be a Recycled Shag Rug. The only sewing involved is straight stitches on a machine. The instructions recommend bunching the material; however, if you wanted to leave out that step, I think you probably could. It just might be a little less shaggy!

The other kind of homemade rug I typically think of is a woven rag rug. My grandmother has one in her house that I have always loved! If you ever managed to use one of those potholder loom kits as a child, you can probably manage this!


There are several different sets of instructions you might try depending on what sounds easiest to you: 1 and 2!

Finally, there is what we refer to as "Floor Clothes." Basically, you sew anything you want on a durable piece of fabric and place it on the floor! You could attach it to a rug canvas or use some of that carpet tape they sell at Lowe's to keep it in place better.

If you want more ideas to get you started, then you might take The Rug Tour. The great thing about making rugs is that you can 1) Make exactly what you want or 2) Use scraps of what you have so that it doesn't cost you a thing!

Thursday, May 6, 2010

Susie Home Maker: Walls

"You can hang the dreams you want as pictures on the wall." from the 1951 movie, Here Comes the Groom

The next installment of our Susie Home Maker series (inspired by my cousin Susie who is moving into her first apartment this year!!!) is "Walls." I mentioned in Susie Home Maker: Windows that our apartment had cracks on the walls (not to mention a lot of other blemishes). While some places will let you paint the walls, stencil, put up a boarder, etc., not all of them will. My advice: Get something up on the walls ASAP!!! It is amazing how such a simple thing can make your apartment feel so much more like home (especially when every single wall is the same, bland, neutral color)!! Getting something up on the walls does not have to be an expensive or time-consuming venture. The only wall hangings I have purposefully gone out and bought were posters for the kids' room. All of the rest were either gifts or created relatively quickly from something I already had. Below are just a few of the different ideas I have used over the years.

1) A nice poster, that is well hung, can add a splash of color with little cost or effort! I usually laminate my posters before hanging them to keep them looking nice and protect them from being damaged.

A set of creation posters I bought for the kids' room. I added the white numbers from a package of mailbox numbers as well as the ribbon to tie it all together!

Another colorful poster I bought for the kids' room (notice there is a definite theme).

A poster my mom gave me that I have always kept by the washer and dryer. It doesn't go with a lot of the decor in the rest of the house, but I have always liked it! It was looking pretty rough from years of use until we laminated it!

A poster I made to hang in my office (when I was working with junior high students) using a FarSide comic I had saved from a tear off calendar. I actually made several, and I have to say I like how it ended up looking with large black and white comics hanging around the room! It also had some sentimental value because I worked for my dad for several years, and he always taped FarSide comics from tear off calendars to the cabinets in his lab.

2) Shelves can add both a splash of color and solve some of those space issues so prevalent in apartments!

I got these shelves from a craft store, finished them, and hung them in our living room to hold my Noah's Ark collection until they came to their final resting place in the kids' room!

This mirror with hooks and a small shelf was a wedding present, and I have to say it has been a real lifesaver! I cannot remember where I put my phone, keys, jacket, purse, etc. to save my life, but since we hung this by the door, I haven't had to make extra sets of keys!!!

3) I grew up loving to play games and work puzzles. My husband does not really like playing games (I am hoping at least one of the kids will), but he does enjoy working puzzles with me from time to time! These are two puzzles that we worked together that went particularly nice with the decor of the house. My mother had them framed as a gift. Don't they look beautiful??? Using puzzles you could have the beauty of Thomas Kincaid (or someone similar) in your home without paying an outrageous amount or ending up with a cheap looking copy!

A puzzle we did together before we got married that has always hung in our den.
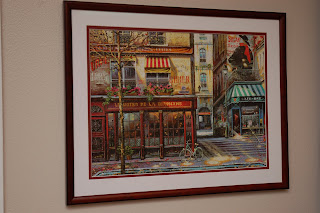
A puzzle we did before Jessica was born that hangs in our dining area (with all of the other French pictures).

You can hang/frame all kinds of items that mean something to you: t-shirts, artwork, awards, clothes from childhood, pressed flowers, doilies collected from antique stores perhaps on a dark background (I hear this is an up and coming trend....not that I usually know much about such things), etc.

4) You all know that I love homemade items! However, I have had to make very few items to hang on our walls because we already had several nice pictures, posters, etc. that we really liked! Here are a few of the homemade wall items we have in our home.

A scripture my kindergarten teacher cross-stitched for me when I was a senior in high school. She also cross-stitched us another framed item when we got married.

A painting a family friend did for us when we got married. She was truly gifted and has since lost her fight with cancer.

Name plaques I made for the kids' room using some nice looking paper, the computer, and some classy looking frames from Wal-mart.

A cute name plate my sister-in-law made when Jessica was born! Isn't it adorable? (I hear she is making one for John too!)

I am also working on another framed item at the moment, using the poem "Children Learn What They Live." Some day I would like to embroider it and frame it, but I think I will have to settle for a nice computer-printed version at the moment!

4) Something I have been doing since I was in junior high is picking out souvenirs when I travel that I would keep in my home when I grew up for a long time!

I bought these prints at the bottom of the Eiffel Tower when I was in high school. My mom later framed them as a gift!

I bought this print in Gatlinburg, Tennessee on a vacation in Junior High. Once again my mom had it framed as a gift!

Prints can be relatively cheap. What makes them look like something special is how they are framed!

5) There are all sorts of other types of wall hangings such as wreaths, quilts, shadow boxes, etc. Especially if you have a large space to fill and not a lot of money, I would try to find a quilt to hang! It will also help absorb sound!

This is a wall hanging a friend's mother (who is Ukrainian) made and gave to my mother, who gave it to me when I got married. Isn't it absolutely gorgeous?


My dad once studied English with a college student from Taiwan. This is a wall hanging he gave my parents while he was living in the United States. It says something about a happy marriage. My parents gave it to me when I got married. (If I am correct, I am not only the one who remembers him the best, but I am also the only one who remembers how to use chopsticks.)

6) Once people know that you have a collection of something, you will probably get lots of gifts to add to that collection! The decor in the kids' room came from my Noah's Ark collection, which started when I was teaching the infant Noah's Ark class at church for several years in a row, and people just started giving me Noah's Ark stuff. (And yes, I learned that story very, very well. My grandparents' favorite Bible trivia question to give me is "What are the dimensions of the ark?")

Actually, they did not all come two by two, but it looks cute over their door!

Two other pictures I was given as gifts for my collection.

Another popular time to give wall hangings as gifts is when you have a baby. These are some wall hangings my sister gave us for Jessica's room, but they ended up in her bathroom because they looked perfect there! The ribbon again was a nice touch!

7) Then there is always the old standby of hanging up photos. I do love to hang photos. In our apartment we had a staircase going upstairs that was very bare and echoed. I took large photo frames and filled them with pictures to look at as you went up the stairs. It really helped make the space less bare! I have set out frames in our house, but I have not hung very many photos yet mostly because I am going through and redoing each room one by one. I typically like to hang photos in hallways, but we don't really have any hallways at this house so I will probably hang several photos in the den, once I get around to finishing that room (The bedrooms needed the most work, so we started there.)

The real trick to wall hangings is not so much what you are hanging but how you choose to hang it!

1) Build/Buy (or ask for as a gift) a nice frame. The cheap frames will make whatever you are hanging look cheap, but if you use a nice frame, it can make something cheap look really nice!

2) Use the correct hardware. First, you do not want your wall hangings falling off the wall! Second, it looks a lot less temporary when you use the correct hardware as opposed to just tacking everything to the walls! This especially applies to quilts. See this website for more information on how to hang a quilt.

3) I also try to be careful where I choose to hang different items. For example, all of the Noah's Ark stuff goes in the kids' room. All of the pictures from France go in the dining area. FarSide and airplane posters usually go in the office. Most of the photos usually go in a hallway (if we have one). Start out by figuring out what you do have and how you could use those items. Then figure out how you will fill in the gaps.

Feel free to leave any suggestions of ways you might fill wall space in a classy way without spending an arm or a leg!

Bathrooms tend to be a more difficult space to work with in apartments. Their walls are usually much taller than they are wide! We'll look at what you can do in there from a frugal and self-sufficient perspective next!

Thursday, April 29, 2010

Susie Home Maker: Windows

"Now take your eyes, why they're the windows. Showing you every view in the sun. Honey, you've got a house, your own little house, and it's better than anyones. So just keep outside shined up, and the inside free from gloom..." from the 1951 movie, Here Comes the Groom

The apartment we lived in when we first got married apparently was a pretty cool place to live....in the 70's......it had a pool, raquetball court, game room, etc. By the time we moved in 30 years later, the pool had been filled in, the raquetball court turned into a wall of mail boxes, the game room turned into an office, and we later learned that the apartment complexes across the road had all kinds of illegal activities going on... On the inside, one of the worst features was the windows. Perhaps it was the cracks in the walls around the windows, or perhaps it was the metal framework of the windows. However, the apartment was in our budget, and it did have a lot of closets! I learned very quickly that window dressings can do a lot for the windows in an apartment!

A gathered valance I made to go in our kitchen when we first got married now hangs in our office!

My favorite kind of curtains are valances. They require the least amount of material and are very easy to make even if you are brand new to sewing! The other great thing about valances is that you are only limited by your imagination! I always start by deciding what fabric I am going to use because that is where the real expense can be. I don't typically walk into a JoAnn's to find the right fabric. Usually I look in my stash of fabric I have collected for free or cheap over the years and see what will match. Then I figure out how to style it so it goes in my room. However, if you do not have a fabric stash, you could very easily find a full dress at a thrift store, an old quilt, or even smaller pieces of fabric that could be sewn together or something really different like men's ties or old t-shirts! If you are able to find a full skirt at a thrift store, then you may also have the added bonus of trim already attached to the bottom of your valance! I don't usually use trim just because it can be rather pricey, but it can be fun...especially if you get it for a great price!

A gathered valance I made for the kids' room with a little extra "flounce" to it!

Once you settle on your fabric, then it is time to decide on the style for your valance. There are many different ways to make a valance: gathered, ungathered with a decorative edge, ballooned, etc. If this is your first or one of your first sewing projects, you might appreciate using a pattern, but don't buy it at full price at a JoAnn's. Wait until they are on sale for $.99! (Or Susie, in your case you could always call me or Aunt Beth). For a very basic gathered valance, you simply: 1) Cut a rectangle at least 2 times as wide as your window and a couple inches taller than you want the finished project to be. 2) Hem all four edges. 3) Bend an inch or so at the top towards the back of the fabric and make one long seam across. This makes a loop that you string through your curtain rod.

Two valance patterns I have acquired over the years. They are great when you haven't a clue what you are doing, but once you've made a few, you should be able to figure it out yourself!

The great thing about gathered valances is that while they take a little extra fabric, they also hide more of the wall, hide any imperfections in your sewing, do not require a lining, and do not require any fancy curtain rods. Those cheap metal curtain rods will do just fine! Another plus is that unlike their floor-length counterparts, valances let it lots of light and really open up a small space....a definite necessity in a small apartment!!! Also, if at some point you move, oftentimes the curtains can be used again on different sized windows....or you can even cut up the curtains to make other things because it just a long rectangle of material!

Note: Long, thick curtains can help keep your home cooler; however, in my experience, no window treatment is going to make that big of a difference in an apartment. Usually the insulation is just not that fabulous. You are better off trying to get an apartment on the middle floor!

A cute bag for blocks made out of part of a valance I made for my college dorm room!

Once you have your window measurements and a color scheme (I always go with primary colors because you never have to worry about whether or not something with match!) for your apartment, you are now ready to start hunting up fabric treasures!! Don't forget to check antique stores as well....I have found several fabric stashes for cheap at antique stores!

Wednesday, April 28, 2010

Susie Home Maker

This is my cousin, Susie. In some ways she is more like one of my sisters. When our grandmother was dying, she lived with us part of the time while her mom was being the great nurse that she is. I don't think any of us remember how long she actually stayed with us, but sometimes even brief periods of time in childhood can seem longer (in a good way) than they really are. Now that we are both grown-up we enjoy reading some of the same books, talking about the same kinds of things, looking for treasures at antique stores, etc.


One of Susie's latest adventures is moving into an apartment for the first time this year!! I am very excited for her to have a larger canvas on which to express herself! In honor of her new adventure, I am going to be posting some projects that I have either done or would like to do (someday....) that are particularly conducive to making an apartment a home (from a frugal and self-sufficient perspective of course)! So...Congrats Susie!! Love, Amy (David, and your favorite niece and nephew, Jessica and John)

Wednesday, February 24, 2010

"His Name Is John."

This is a picture of part of Jessica's room shortly before she was born.


Once John is on a good sleeping schedule, he will be sharing that room with Jessica. Since the room was already appropriate for a boy or a girl, baby or young child, there has been very little to do to get that room ready for a second occupant! However, I am adding a few small touches to make it seem like the room belongs to more than just Jessica. I changed the pink changing pad out with the blue one, set out a stuffed bear specifically for John, and got Jessica situated in her toddler bed (well....actually it appears that she has decided on her own to move to the bottom bunk).


Last night I made plaque with John's name in Hebrew and English with the meaning and Bible verses it comes from to match everyone else's.


I only have one more thing left to do to their room, and then I will be completely done with that portion of the preparations!

Saturday, September 19, 2009

Our New Couch!

In general, I like to do most things myself; however, I did not want to make my own couch! David and I have pretty different ideas about what we wanted in a couch. He wanted something soft, plushy, and all one color. I wanted something that is durable, doesn't stain easily, doesn't readily show imprints of where someone has sat a lot, and preferably a print to hide stains. After much searching we finally found the right couch for the right price. It is soft and plushy but seems to be made out of pretty durable fabric. It looks like microfiber, but it is not. As a bonus, it is also a sleeper sofa! It is all one color; however, at the price of $89, I really can't get to upset if Jessica stains it!

Our new couch!

I know you are wondering what is wrong with it for us to get it for $89. We got it from a store that sells people's used and new furniture. The people had only wanted $100 for it, and it was on sale this weekend! One of our friends who helped us move it said he detected a very faint smoke smell to it; however, it is faint enough that David didn't smell it. There is one very small cigarette burn in one of the arms. Other than that, it is in great condition!

The small burn in the arm

Perfect for a house with small children! We had considered a sectional; however, a friend reminded me that the kids would not be able to run circles around the living room as easily with a sectional there so we decided to go with a couch instead.

Our old couch.

You may be wondering what possessed us to get a new couch. Well, the seams on the other are slowly coming apart. I have stitched them back together once and there isn't any fabric left to do it again.

A close of of one of the seams.

A close up of one of the corners.

My neighbor bought the couch in about 1995 (back when it was a blue leather couch). My mother had it recovered before we got married in 2003 with some denim fabric we bought on sale. It has definitely had a good, long life!

Tuesday, August 11, 2009

Making a House a Home: Guest Room


The third post in our Making a House a Home series did not take as long, partly because I have been working on the house like crazy while trying to get over our recent loss. (I have been about to drive my husband crazy!) The room featured this time is the Guest Room! As we live in a vacation area, we typically have a lot of guests, particularly during the summer months. (Although this year we haven't had hardly any. Probably due to the recession.) For now we have found it convenient to have a guest room. Eventually I will probably loose our guest room to children, but hopefully not for a while! Overall, we estimate that we spent a total of about $40 on this room. These are pictures of the room before we moved in.


Once we bought the house, I immediately started figuring out where we were going to put the furniture. We decided to put the furniture that had been in our bedroom (before we made the rope bed) in the guest room. The furniture had originally belonged to my great-grandmother, and the mattress and box springs had been my parents when they got married! It was definitely time to retire these pieces to less heavy duty usage! The next thing I started thinking about was what other items I wanted to go in the guest room. Since we were not going to be using the full size bedding on our new bed, I already had a color scheme: yellow and blue.

One of the pictures I bought as a souvenir while on vacation, and the other a friend painted as a wedding present.

The first thing we did upon moving in was repaint the room. All of the paint jobs in the house were sloppy, but this room was just awful! They had not used a primer on the dry wall so the paint started peeling on the wall in sheets taking dry wall with it! We ended up have to patch the walls, spray texture over the patches, primer twice because some of the previous paint was very dark, and paint a coat or two of the new color! It was very frustrating and took quite a while! We ended up painting the room a light yellow to go with the bedding and hopefully enlarge the room. As I have said before, I like to use variants of the primary colors in my house because just about every color will go with them! We also decided to put up crown molding as it is hard to avoid painting the ceiling when you have a popcorn ceiling! David once again did a very nice job on that!


Now it was time to start adding the finishing touches! My mother had made some lace curtains for the room we got married in, so I hung those over some light blue blackout curtains I had gotten on clearance at Wal-mart for $20. The curtains looked more like shower curtains, but they do their job (keep out light and help with temperature control) and look much nicer with the lace curtains on top! Since the room already had an antique feel to it, I added an antique chair I plan to reupholster some day, a quilt rack with afgans made by relatives, and an old hurricane lamp. I decided to add some seashells since it is a guest room near the coast! We also took apart her ceiling fan and spray painted the brass parts. It turned out great and very economical! This is the second ceiling fan I have done. As I have said before we are replacing all of the blinds and door knobs in the house, and I have not included that in the price of the redo. (Although you can see from the pictures I still have to repaint the doors and change the doorknobs. Maybe next week...)


I am pleased with what we have done with this room, but my favorite part is storage space! In this area of the country we have to be very careful about where we store things because of intense heat and hurricanes; therefore, I decided to store Jessica's old baby clothes in the dresser organized by age so it will be easier access as we have other children! I also stored old clothes under the bed to be used for later sewing projects, and I put all of our camping gear in the top of the closet. So much storage space and yet it still doesn't look cluttered!!

Wednesday, July 8, 2009

Our Rope Bed - Part 2

Last year, David and I decided to build ourselves a rope bed as a more economical option to buying a new mattress, frame, sheets, etc. See Our Rope Bed - Part 1
for the details. We have just completed phase two: the mattress, down feather topper, and sheets.


This is the frame David built during Part 1. Total cost of materials was $150, and it should last a lifetime.


We started making the mattress with one layer of polyester batting and 10 layers of cotton batting.


Next we took the cotton batting and foam out of the old full sized futon mattress my mother gave us and layered it on top. We also took some of my polyester fiberfill and fabric scraps to add to the mix.


Then we put another layer of the polyester batting on top. The polyester batting came from my mother-in-law. It was leftover from some school projects.


Lastly we placed 10 more layers of cotton batting on top of all the other layers. The cotton batting I bought online 50% off for $150.


This is a side view of the layers. You will notice that the cotton batting from the old mattress is not compressed like the new batting I bought. It seems to make for a bit firmer mattress. I think it will last longer with the addition of the compressed batting.


Then we stuffed it into a pillowcase like mattress cover.


I chose to safety pin the opening closed so that I could open it later and add more fabric scraps as they are available. I was going to make stitches in the mattress to hold it all together, but the needles I bought bent when I tried. Thankfully it does not seem to be necessary. If I were to go back and make the mattress again, the only thing I would change would be to safety pin the top and bottom layers of batting together to help old the structure a little better and to safety pin at least two sides closed so it would be easier to get access to the entire inside of the mattress. However, it seems to work just fine as is!


I tried to sew the old full sized feather topper and my sister's old twin feather topper together, but it proved too much for my sewing machine so I just stapled it together. (My sister gave us the old twin feather topper that she no longer uses.) The feather topper really makes a poly/cotton/foam futon mattress much more comfortable.


The stapling seemed to work out just fine! Below are the sheets I made on the final product. I spent a total of $100 on fabric for the sheets and the mattress. I ordered it from an online wholesale fabric store that specialized in wide fabrics so I would not have a seam down the middle of the sheets.


And there you have it! Our California King Sized Rope Bed with new mattress and sheets for a total investment of about $400!

We have already started working on Part 3: the quilt and down comforter for winter. When we got married, we sent out quilt squares with the wedding invitations for people to decorate and bring to the wedding. I am really enjoying going through all of them and putting them together! I will post pictures once I am finished. We are also still planning to had a headboard and a footboard, but that will probably have to wait until next year. There are too many other projects to work on right now!